Introduction
Many people are surprised to learn that raw flour is not considered a ready-to-eat food. Although flour may appear clean and safe because it is dry and shelf-stable, it can sometimes contain harmful bacteria such as Escherichia coli (E. coli) and Salmonella. These microorganisms can contaminate grains while they are growing in the field or during harvesting, transportation, and processing. Because flour is typically not treated to eliminate bacteria before it reaches consumers, using it raw in recipes can pose a food safety risk.
Heat treating flour is a simple process that helps destroy potentially harmful microorganisms before the flour is used in recipes that are not fully baked or cooked. This is particularly important when preparing edible cookie dough, cake batter, homemade play dough, baby foods, or other recipes that contain raw flour. While many people traditionally use an oven to heat treat flour, the microwave offers a faster and more convenient alternative. With only a few minutes of preparation, you can make flour safer to use without significantly affecting its taste, texture, or baking performance.
This guide explains why heat treating flour is important, how to safely heat treat flour in the microwave, and how to store and use the treated flour afterward.
Why Heat Treat Flour?
Heat treating flour is primarily a food safety measure. Although outbreaks linked to raw flour are relatively uncommon, several documented cases have shown that flour can harbor dangerous bacteria capable of causing serious illness. When contaminated flour is consumed without adequate cooking, these bacteria can survive and enter the digestive system, potentially leading to symptoms such as stomach cramps, diarrhea, nausea, vomiting, and fever.
Certain groups are particularly vulnerable to foodborne illnesses. Young children, older adults, pregnant women, and individuals with weakened immune systems may experience more severe complications from bacterial infections. Heat treating flour helps reduce these risks by raising the temperature high enough to kill harmful pathogens before the flour is incorporated into recipes.
Another advantage of heat treating flour is that it has minimal impact on its functionality. Many people worry that heating flour might alter its baking characteristics, but when performed correctly, the process does not significantly affect gluten development, texture, flavor, or overall baking performance. The flour remains suitable for use in cookies, cakes, breads, sauces, gravies, and many other recipes.
Related Posts:


The microwave method is especially appealing because it saves time. Unlike oven treatment, which requires preheating and longer heating periods, microwave heat treatment can often be completed in less than five minutes. This makes it ideal for last-minute baking projects or small batches of flour.
Microwave vs. Oven Heat Treatment
Both microwave and oven methods can effectively heat treat flour, but each has its own advantages and limitations.
The microwave method is significantly faster. Most batches can be safely heat treated within two to three minutes, making it an excellent option when time is limited. It also consumes less energy because there is no need to preheat a large appliance. However, microwave heating can sometimes create hot spots, which means the flour must be stirred frequently to ensure even temperature distribution throughout the batch.
The oven method generally provides more uniform heating because warm air circulates around the flour. However, it usually requires fifteen to twenty minutes of heating time, plus the additional time needed to preheat the oven. For larger quantities of flour, the oven may be more practical, but for most home bakers preparing one or two cups at a time, the microwave offers greater convenience.
Materials Needed
Before beginning the heat treatment process, gather the necessary supplies.
You will need one to two cups of flour, either all-purpose flour, whole wheat flour, or another variety suitable for your recipe. A microwave-safe bowl made of glass or ceramic is recommended because these materials distribute heat more evenly than some plastic containers.
A heat-resistant spoon or spatula will be necessary for stirring the flour throughout the process. While optional, an instant-read digital thermometer is highly recommended because it allows you to verify that the flour has reached a safe temperature.
Having all materials ready beforehand helps ensure the process proceeds smoothly and safely.
Step-by-Step Guide to Heat Treating Flour in the Microwave
Step 1: Measure the Flour
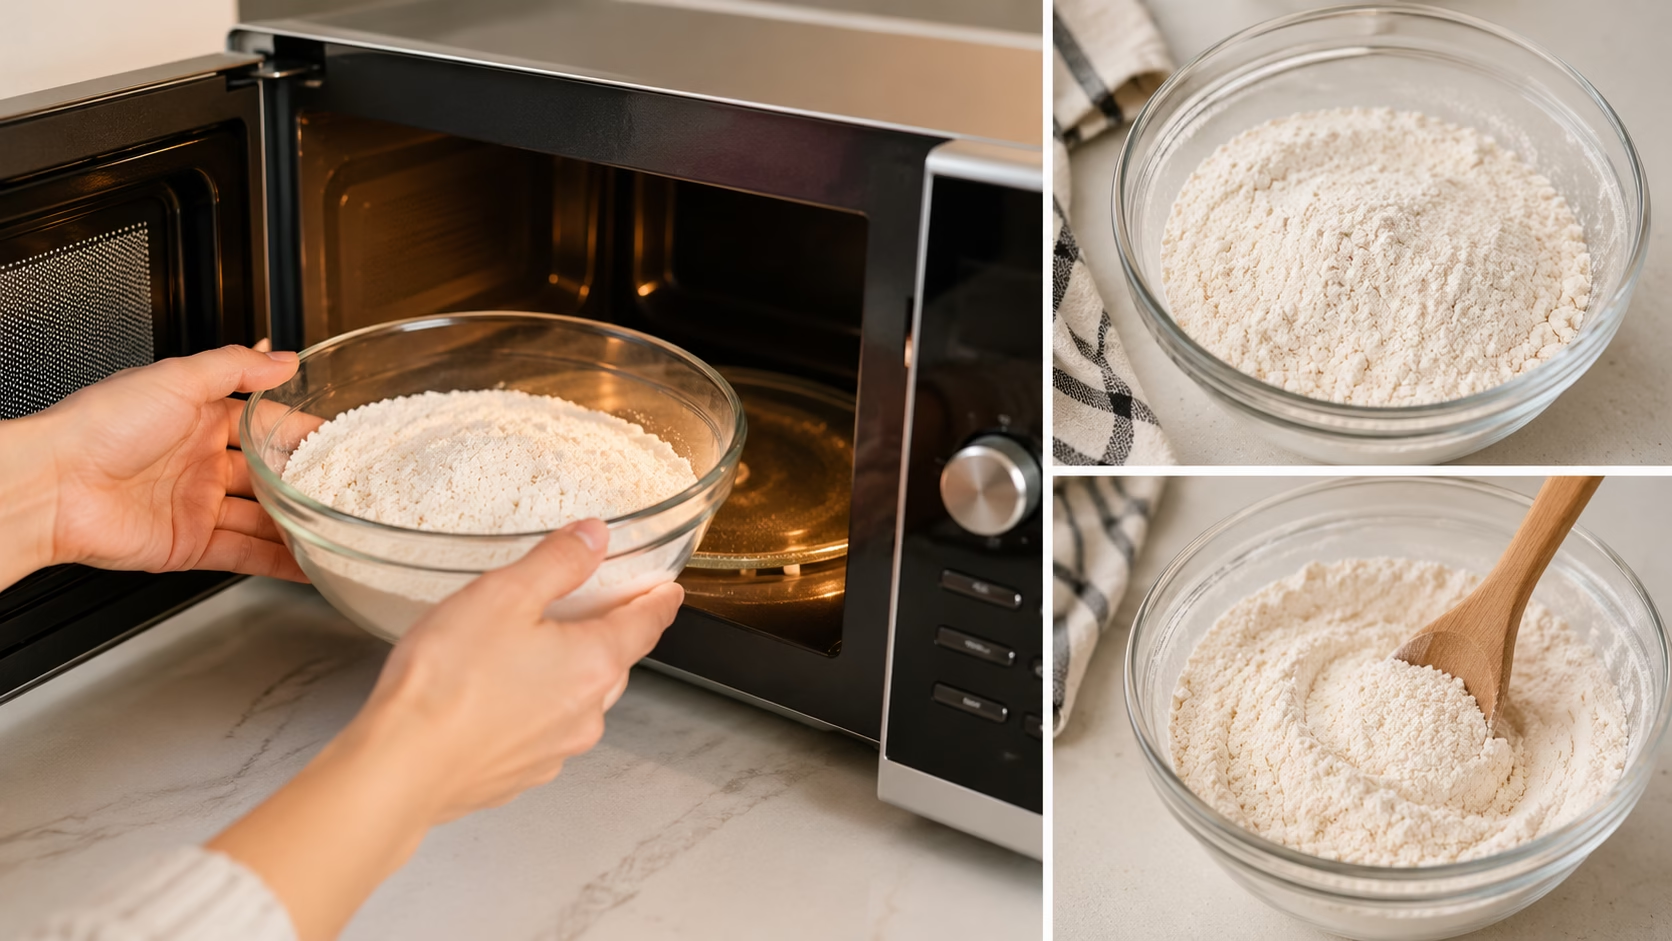
Begin by measuring the amount of flour you intend to heat treat. Smaller batches generally heat more evenly than larger quantities. For best results, limit each batch to one or two cups.
Place the flour into a microwave-safe bowl and spread it into an even layer. Breaking apart any visible clumps before heating helps promote consistent temperature distribution throughout the flour.
Step 2: Select the Appropriate Microwave Setting
Set your microwave to medium power, typically between fifty and sixty percent. Using a lower power setting helps prevent overheating and reduces the likelihood of scorching portions of the flour.
If your microwave does not offer adjustable power settings, you can still achieve safe results by heating the flour in short intervals and allowing brief resting periods between cycles.
Step 3: Heat in Short Intervals
Microwave the flour for thirty seconds, then carefully remove the bowl and stir the flour thoroughly. Stirring is one of the most important parts of the process because microwaves do not heat materials uniformly.
After stirring, return the bowl to the microwave and heat for another thirty seconds. Continue this cycle of heating and stirring until the flour reaches the desired temperature.
Step 4: Verify the Temperature
The goal is to heat the flour to at least 165°F (74°C). This temperature is generally considered sufficient to destroy harmful bacteria that may be present.
Insert a digital thermometer into the center of the flour and check the temperature. Because flour can contain hot and cool spots, it is helpful to measure several locations within the bowl to ensure the entire batch has reached a safe temperature.
If any portion remains below 165°F, continue heating in additional short intervals and stir thoroughly between each cycle.
Step 5: Cool the Flour
Once the flour reaches the target temperature, allow it to cool completely before using it in recipes.
Leaving the flour in the bowl for ten to fifteen minutes while stirring occasionally helps release trapped heat and moisture. For faster cooling, spread the flour onto a clean baking sheet, tray, or large plate.
Cooling prevents condensation from forming and helps maintain the flour’s original texture.
Tips for Achieving Even Heating
Successful microwave heat treatment depends on achieving consistent temperatures throughout the flour.
Working with smaller batches improves heating uniformity and reduces the risk of uneven treatment. Frequent stirring is essential because it distributes heat and breaks apart any developing hot spots. Skipping the stirring process can leave portions of the flour insufficiently heated.
In very dry climates, some bakers lightly mist the flour with water before heating. A small amount of moisture can improve heat transfer, but excessive moisture should be avoided because it may create clumps and alter the flour’s consistency.
Using a wide, shallow bowl rather than a deep container can also help promote more even heating.
How to Know If the Flour Was Successfully Heat Treated
After the flour has cooled, inspect its appearance and texture.
Properly heat-treated flour should remain light and free-flowing. It may develop a very mild toasted aroma, but it should not smell burnt or cooked. If large clumps have formed, break them apart gently with a spoon or sift the flour before use.
If the flour still smells strongly raw or if temperature measurements were inconsistent during heating, repeating the process may be advisable to ensure adequate pasteurization.
Storing Heat-Treated Flour
Once cooled, heat-treated flour should be stored properly to maintain quality and prevent contamination.
Transfer the flour into an airtight container such as a glass jar, food-grade plastic container, or resealable storage bag. Airtight storage helps protect the flour from moisture, pests, and environmental contaminants.
Store the container in a cool, dry location away from direct sunlight and excessive heat. Labeling the container with the date of heat treatment can help track freshness. Although properly stored flour can remain usable for an extended period, using heat-treated flour within six months generally provides the best quality.
Using Heat-Treated Flour in Recipes
Heat-treated flour can be used in virtually any recipe that calls for flour. It is particularly useful in recipes where flour will not undergo additional cooking or baking.
Popular uses include edible cookie dough, cake batter dips, dessert fillings, protein balls, homemade play dough, frostings, baby foods, and various no-bake treats. Because the heat treatment process has little effect on baking performance, the flour can also be used in traditional baked goods such as cookies, cakes, breads, and pastries.
Many home bakers choose to keep a supply of heat-treated flour on hand specifically for recipes that contain raw ingredients.
Conclusion
Heat treating flour in the microwave is a quick, simple, and effective way to improve food safety without sacrificing baking quality. Although raw flour may appear harmless, it can occasionally contain harmful bacteria capable of causing illness. By heating flour to at least 165°F and following proper stirring techniques, you can significantly reduce this risk in just a few minutes.
The microwave method offers a convenient alternative to oven pasteurization, making it ideal for busy home bakers and anyone preparing recipes that use raw flour. With proper storage and handling, heat-treated flour can be kept ready for future baking projects and used confidently in a wide range of recipes.
Taking a few extra minutes to heat treat flour provides valuable peace of mind and helps ensure that every batch of cookie dough, dessert, or homemade treat is as safe as it is delicious.
Disclaimer
This article is for educational purposes only and does not replace professional medical advice, diagnosis, or treatment. Seizures, severe headache, confusion, visual changes, or blood pressure readings in the hypertensive crisis range require urgent medical evaluation.